🎬 Intro #


Feature creep is a hell of a drug. Before my NAS build had even 1 hour of uptime I decided I would entirely change how I was planning to use the NAS and so some things had to be changed.
I will go into more detail about my thinking and methodology in part 3 of this series and even more detail about the setup in part 4 where I go through the configuration and Ansible role to do this yourself.
For now, here are a few things I added/modified before the ultimate configuration.
🔧 Fixes #
SATA Connections #
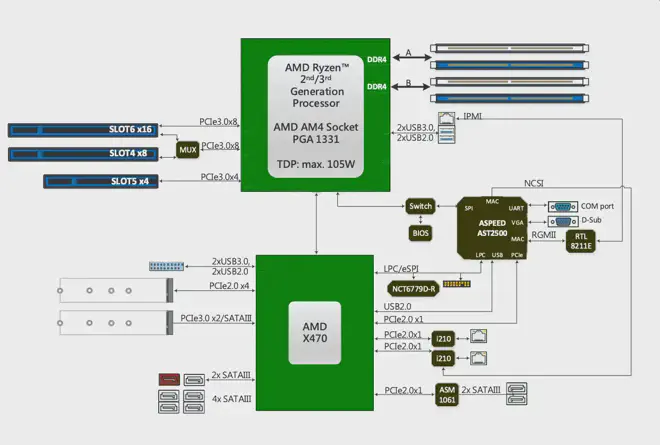
While reviewing the manual, I realised that the arrangement of the SATA ports on the block diagram differed from my initial assumptions. I had plugged two of my soon-to-be ZFS SSDs into the SATA ports on the ASM1061 and not the X470 chipset.
Here is how I had initially connected everything, with the boot SSD eventually plugged into the white port facing outwards.
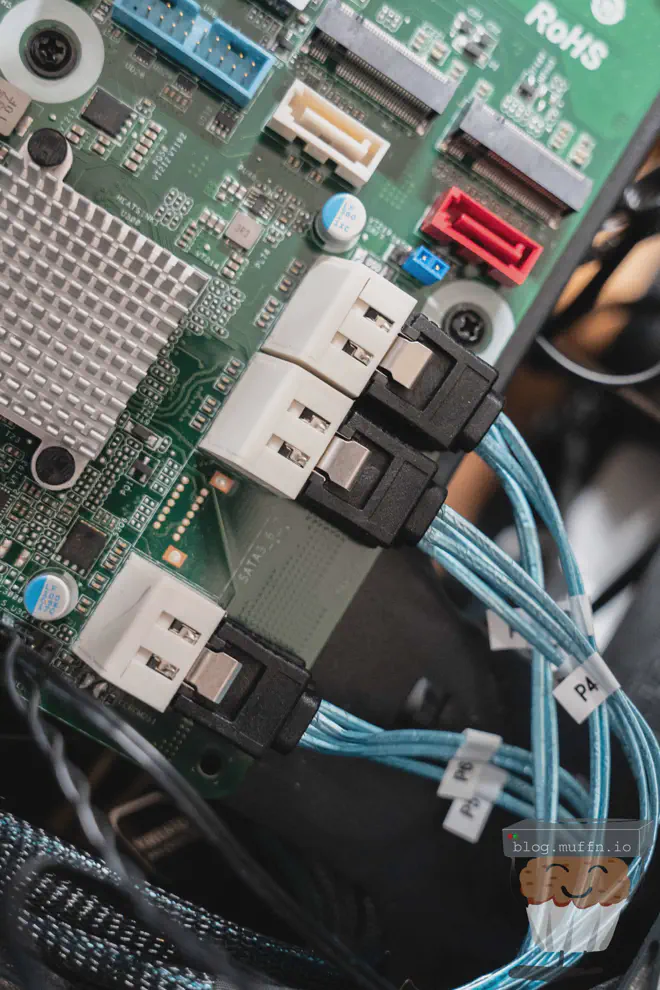
According to the block diagram, the ASM1061 SATA ports are the bottom two, with the 6x X470 ports being the 4 blocked together, along with the 2 facing outwards. The block diagram in the manual was the only place where this was clearly indicated, which isn’t all that helpful as the only indicator this is the case is the red port, the red one being for use with powering a SATADOM if required by setting a jumper directly below it.
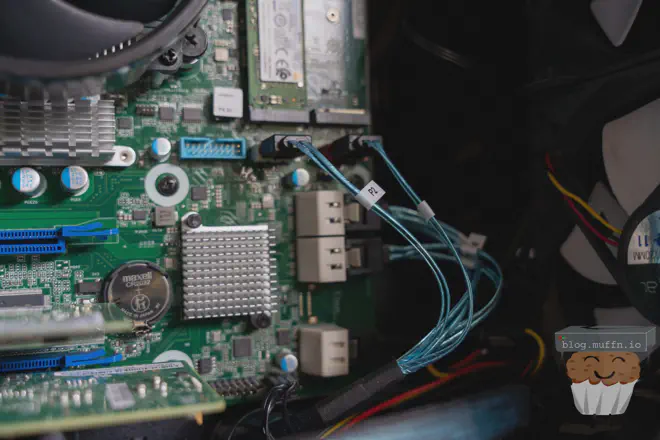
Whilst everything still worked like this, I wouldn’t be getting the full throughput of the SSDs under ideal conditions, so I changed it to the correct ports.
Disk Dilemmas #
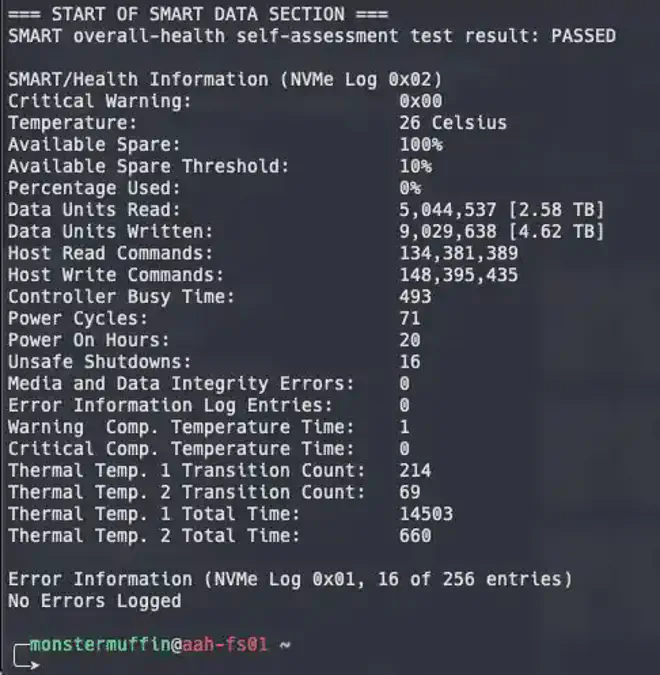
In my initial build post, I explained how I had bought 6x drives from a friend and purchased two additional drives to make 8x and fill the chassis, well, there was a reason those were cheap. After doing some light operations on all the drives, those two drives started throwing a lot of SMART errors. Thankfully, I was inside the returns window and sent them straight back.
What I ended up replacing them with was a used, but in warranty 16TB DC HD550 and a brand new shucked 18TB WD180EMFZ. These are higher capacity than the initial drives but with my new setup this is not only okay, but beneficial as I was no longer going to use “conventional” RAID and would actually be able to make use of this mix-matched disk space.
🚀 Upgrades #
Admittedly, some of these upgrades were driven by my inability to pass up a good deal. And with that..
2TB Intel 670p #
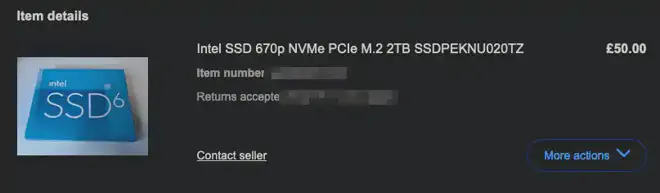
The 670p is a very performant, QLC NAND drive with the 2TB rated for 740 TBW. Gen 4 drives, whilst “better”, were useless here as the slot is a Gen 3 x4, so when I saw this for £50 I couldn’t pass.
Part of the impulse buy was the fact that it was barely used.
Samsung 870 Evo #
When I bought the boot SSD initially, I bought cheap as it was only meant to be booted from, and config written to. Now that I was going to be running a full distro with more moving parts, I wanted a more reliable drive.
I acquired a brand new 250GB 870 Evo for about £20.
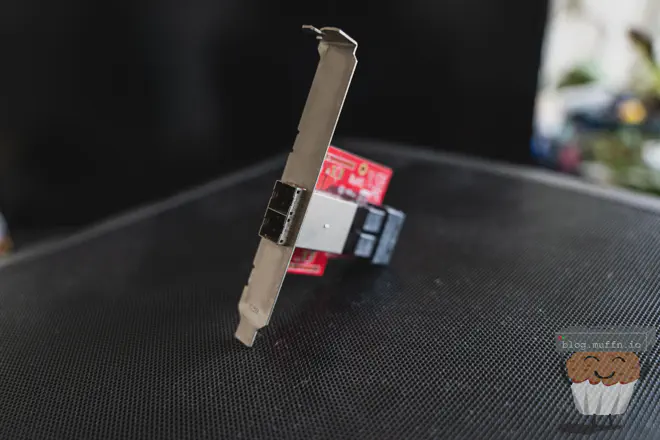
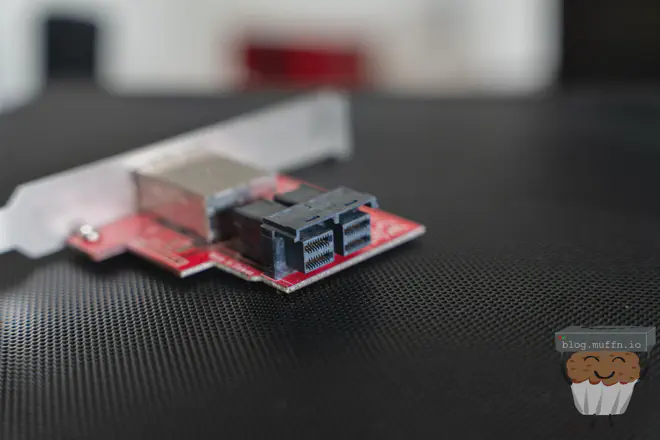
SAS Changes #
In my previous post I touched on my idea to stack another Node 804 on top as a DAS. As it happens, I wasn’t the only person with this idea and it seemed extremely viable, adding the capability for an additional 16 drives, at least.
As soon as I had posted part one of this series, I got this DM on Discord:

The plan is to have a ‘ready to go’‘box of disks’ that will simply plug into power, and then into the existing NAS.
For this, I would need to present some SAS ports on the rear. My current card was an 8i, so 2x internal SAS ports of which I was using. I could expand one port for internal drives, and then pass the second port over to be expanded again in the other chassis.
If you’re following along closely, you might be asking why I don’t just put another HBA in the free PCIE slot and that would be idea, but I had decided to further hamstring myself, that’s in the next section.
SAS3 is much more affordable than when I last did something like this, but SAS2 had also fallen a bit too..
SAS2 and SAS3 expander cards were the same price, with even an Adaptec 82885 being the same price as an Intel RES2SV240. The caveat, of course, would be that I would need to replace my current HBA with a SAS3 one to use the Adaptec 82885T whereas a RES2SV240 would simply mean getting a relatively cheap 16i card, or using an expander inside the NAS. My options at the time were:
-
LSI 9300-16i - £58: Amazingly cheap 16i SAS3 card, cheap being due to the two separate controllers and a switch chip which altogether create a lot of heat and use about 20w of power, which is why it’s a massive card with a massive heat sink.
-
LSI 9350-16i - £180: A pretty drastic increase but a much more efficient card all around.
-
LSI 9400-16i - £220: Included in this price was 4x SFF-8643 breakout cables, which, considering this is a newer card already invalidated the 9350-16i.
-
IBM ServeRAID M1215 - £40: Basically a LSI 9300-8i but IBM branded making it half the price. It’s an 8i SAS3 card. How this would work explained below.
-
LSI 9201-16i - £120: Pretty much the only card I could find that was a SAS2 16i card easily around this price.
And dependent on that choice, I would either need for the DAS end:
-
Adaptec 82885 - £27: (£60 with 7x SFF-8643 breakout.) SAS3 option. The great thing about the 82885 is that it has 2x SFF-8644 external ports that can be used as uplinks, so no need to use any adaptors on the DAS side.
-
Intel RES2SV240 - £30: SAS2 option.
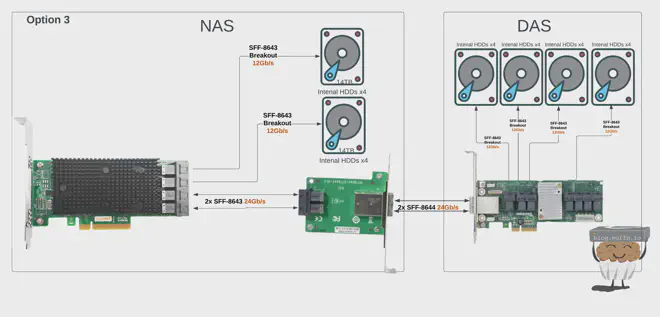
How I was thinking this would go is:

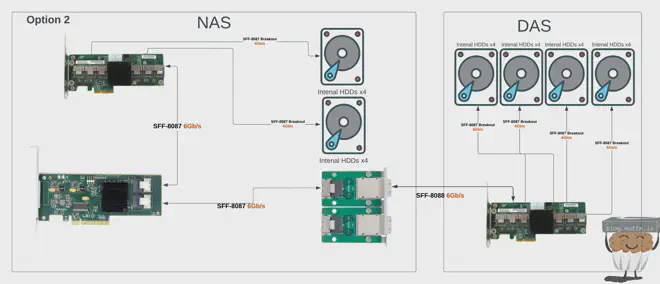
Now, in reality SAS2 is plenty of speed for spinning rust and there are very few real world scenarios where SAS2 would become a bottleneck in this setup, but when the newer stuff is almost as price efficient as the older stuff, it becomes a no-brainer.
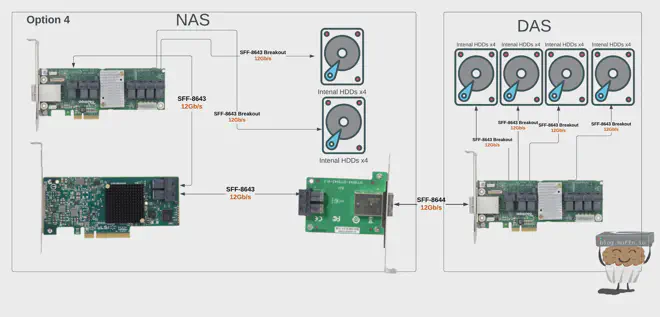
I ended up going with option 4 for the best price-to-performance, option 2 was still going to cost me £60 + the cost of cabling wheres for an extra £50~, I was future proofing and doubling my bandwidth. I might ever be able to make use of it, but to me it was the most sensible option. Even by using an expander for the internal drives, I was still keeping the same theoretical bandwidth to the system as I had originally.
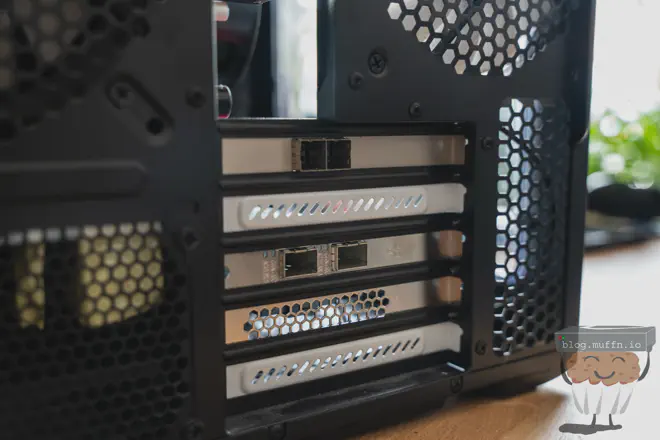
I ended up ordering the IBM ServeRAID M1215 with 2 sets of breakout cables as well as the SFF-8644 To SFF-8643 I mounted in the bottom slot.
I didn’t end up getting the Adaptec 82885 cards in the end. I had bought enough now with the hope that when ‘project stack’ happens, there would be minimal changes required. Hopefully the cards would be even cheaper by then too.
NVME Pool #
The reason I didn’t use the top PCIE slot for another HBA which would have made my life 100x easier and much lighter on the wallet was because I wanted to keep this slot free for more NVME. I had recently been told that my colocation company was closing down due to rising costs and I didn’t want to relocate the server, which meant I would soon be in possession of about 10TB of extra flash. Moving some of this flash into this new NAS seemed like a sensible move.
I intend to use the new flash with ZFS, primarily to use with ESXI and Kubernetes through NFS. This will be something to look into further down the line, for now, I have the slot free and that’s what matters.
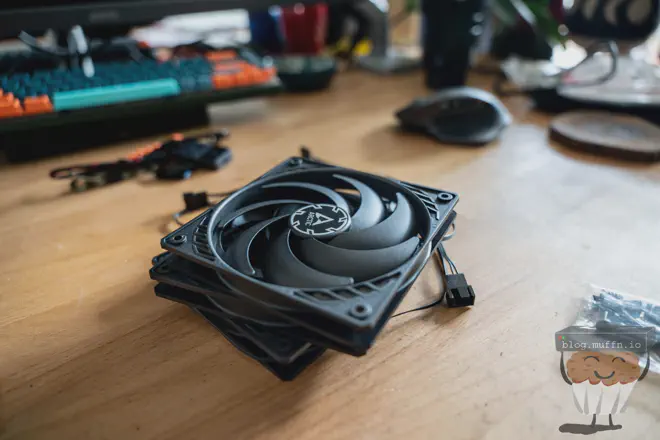
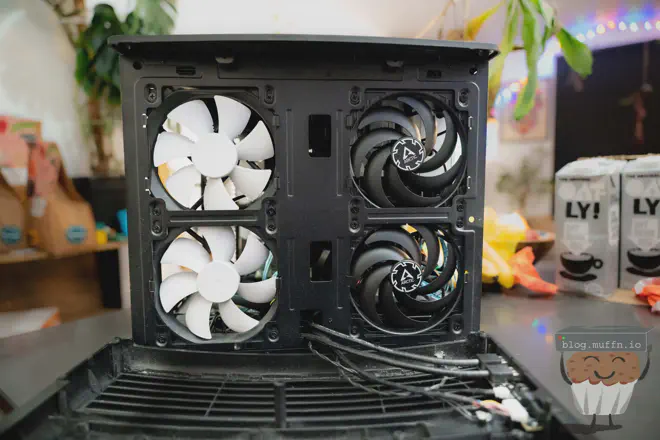
Fans #
I realised that I probably needed more cooling in the case for the drives, and the fan that was already in there was not optimally placed. I got a pack of 3x Arctic P12 Slims which are fans with good static pressure, ideal for pushing air through the drive stacks.
🏁 Fin (Almost) #
And with that, the build is finally complete for my plans. The configuration for this build turned into something much more complex than was required, but that’s the story of my life.
Continue on to part 3 for the actual meat of this series.
Cheers! ~~Muffin