📔 Intro #
This post will be a tutorial on how to get rclone working on Synology’s DSM and enable one/two-way sync between your Synology device and an rclone compatible cloud backend.
Whilst you can do this natively using ‘cloud sync’ by Synology, I much prefer doing it the way in this blog post for the following reasons:
- Flexibility: My method of backup allows for extensive customization options for specific backup needs and supports a wider range of cloud storage providers due to using rclone.
- Advanced Filtering Options: Provides complex include/exclude patterns for precise control over what is backed up, and what isn’t.
- Platform Agnostic: If I put the same config on any other machine running rclone, everything is the same.
- Detailed Logging and Monitoring: Comprehensive logging.
📋 Methodology #
There are two ways of accomplishing getting rclone onto your Synology, natively and Docker. I will be installing and using rclone natively on DSM.
This does have a drawback in that the package is not persistent across DSM updates. It’s easy enough to simply reinstall rclone however we can achieve persistence using DSM’s task scheduler and a shell script.
🚦 Enabling SSH #
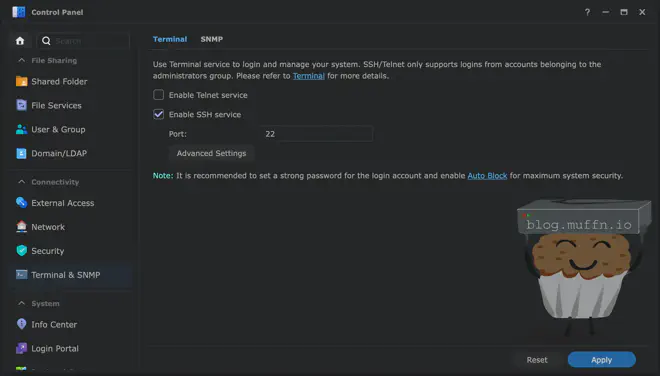
Firstly if not previously done, we must enable SSH.
- Log in to the Synology DSM software using the web GUI.
- Control Panel > Terminal & SNMP > Terminal.
- Enable the SSH service.
You should now be able to SSH into your Synology unit if you couldn’t before, test this out in your terminal of choice using your DSM login credentials.
🧰 Setup #
Installing rclone is as simple as pulling the aforementioned script and running it. You can install rclone manually via an elevated prompt with the following, but this is not required.
curl https://rclone.org/install.sh | sudo bash
To achieve persistence across updates and make updating easier/automated, we will be utilising a simple bash script.
The scripts we will be using can be found on my Github, under Scripts/Synology Rclone.
Via SSH, elevate to a root prompt by using sudo -i and then create the directories we need, you can copy-pasta the below.
mkdir /volume1/scripts/rclone/install -p
mkdir /volume1/scripts/rclone/backup
We will now pull my scripts/configs for both installing rclone and running/configuring the backup:
wget -O /volume1/scripts/rclone/install/rclone_dsm_install.sh https://raw.githubusercontent.com/MonsterMuffin/scripts/main/Synology%20rclone/rclone_install/rclone_dsm_install.sh
wget -O /volume1/scripts/rclone/backup/config https://raw.githubusercontent.com/MonsterMuffin/scripts/main/Synology%20rclone/rclone_backup/config
wget -O /volume1/scripts/rclone/backup/rclone_backup.sh https://raw.githubusercontent.com/MonsterMuffin/scripts/main/Synology%20rclone/rclone_backup/rclone_backup.sh
Make the scripts executable:
chmod a+x /volume1/scripts/rclone/install/rclone_dsm_install.sh
chmod a+x /volume1/scripts/rclone/backup/rclone_backup.sh
Run the install script for rclone:
/volume1/scripts/rclone/install/rclone_dsm_install.sh
This will install the latest version of rclone, or update it to the latest version.

This script will also manage the persistance of rclone’s config. It does this by ensuring the config is stored at /volume1/config/rclone.conf and symlinked to /root/.config/rclone/rclone.conf.
- If a config already exists at the default location, it is moved to the persistent location and linked to the default location.
- If a config is available at the persistent location but not the default location, is it symbolicy linked.
- If neither are available, a blank configuration is created and linked.
If this is the first time you are installing rclone and setting up rclone, the 3rd point most likely applies.
☁️ Configure rclone #
The configuration of rclone will be dependent on what you are using as a backend and what you want to do, and for this reason I won’t be going deep into this. Follow the rclone docs for setting up your backend.
I have my backups encrypted on my backend (Google Drive) and as such have two remotes, the root of my rclone directory and then a ‘crypt’ config underneath this, like so:
root@lcy-fs01:~# rclone listremotes
gdrive:
gdrive-backup-crypt:
Where gdrive: is a root folder called rclone on my Google Drive, and then backup is a crypt config underneath this pointing to a folder backup in that root directory:
[gdrive-backup-crypt]
type = crypt
remote = gdrive:backup
I highly recommend using a crypt backend for anything you wish to backup to Google Drive, or don’t, but be aware of the potential ramifications.
Once you have rclone configured, you should be able to list the contents of the remote without any errors, like so: rclone lsd [your-backend]:
If this command fails, you have issues with your backend configuration, fix these and return.
🔨 Configuring & Running Sync #
Now that rclone is installed and configured, the script for the backup jobs needs to be configured. As previous, the script and config is located at /volume1/scripts/rclone/backup.
rclone_backup.sh is the script itself and shouldn’t need to be changed unless you require modifications as to how it functions.
config is where the script will gather its configuration from and where you will need to input some variables. I have added an explanation and links to the rclone documentation for reference. At a minimum, the following should be filled in:
Mandatory #
LOCALDIRS: This is the directories on the local filesystem that you want to be backed up. You can add multiple directories inside the quotations if required, comma separated.REMOTEDIR: Your rclone backend. Must include:at the end.
LOCALDIRS and your local filesystem to backup to in REMOTEDIR.
Defaults #
Some options have defaults which I use:
TRANSFER_LIMIT: I have the best luck with this at 4, your mileage may vary.EXCLUDE_PATTERNS: These are currently excluding any Synology junk from being uploaded as well as things like.DS_Storefrom MacOS. You can add to this if required.OPERATION_MODE: Default is copy. Please read the docs if you are unsure what to do, but most likely you will want copy. Sync will not be a proper backup, if files are removed from theLOCALDIRSthey will also be removedREMOTEDIRon next run.
You can go ahead and tweak this as much as you like and add other flags under CUSTOM_FLAGS if required.
EXCLUDE_IF_PRESENT and INCLUDE_PATTERN are included by default in the config but are blank as I don’t these options. Populate this if required.
Now we can manually run the script to make sure your settings work. If you want to be extra safe, you can set DRY_RUN at the bottom of config to true for now. To run the script call it via:
/volume1/scripts/rclone/backup/rclone_backup.sh
This should be pretty quick if DRY_RUN is set and you don’t have a lot of data. You can verify what would be copied by checking the log file, which by default is here:
cat /volume1/log/rclone_backup.log
Once you’re happy that’s running as it should, we can schedule the tasks required.
⏰ Configuring Persistence & Scheduled Backup #
Persistent Installation #
Configuring the scheduled jobs will be done via the DSM webui.
- Log in to the Synology DSM software using the web GUI.
- Go to DSM Control Panel > Task Scheduler.
We will first configure a task to reinstall/upgrade rclone if it is removed via an update.
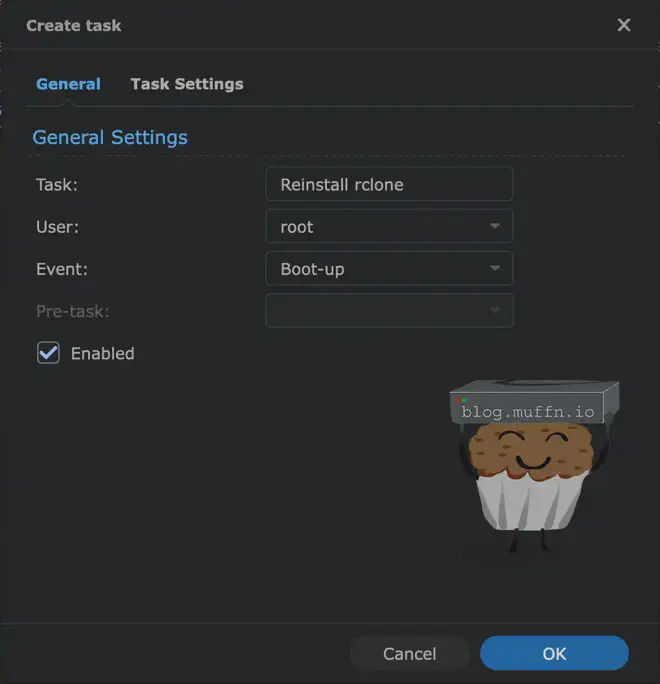
Create a new triggered task by going to: Create > Triggered Task > User-defined Script. Enter the following settings:
General Settings:
- Task: Reinstall rclone
- User: root
- Event: Boot-up
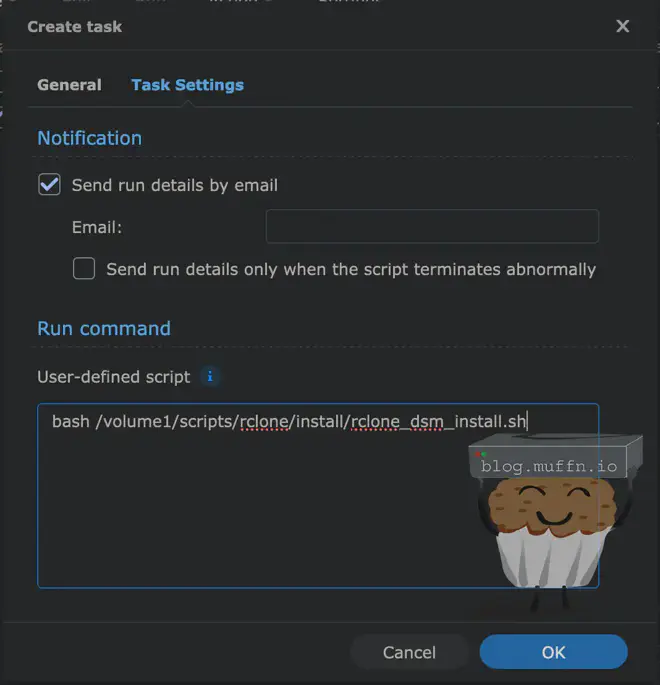
Task Settings:
- Notification: Up to you, I enable this.
- Run command:
bash /volume1/scripts/rclone/install/rclone_dsm_install.sh
It should look like this:
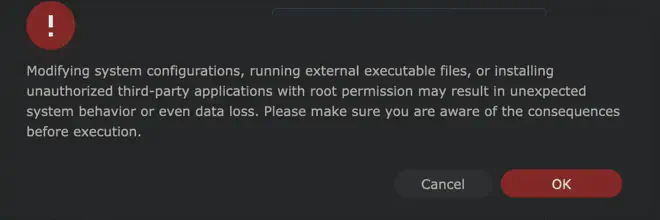
Save it and accept the warning message.
This task at bootup will reinstall rclone if an update wipes it, along with fixing the configuration from the persistent location. We will create an almost identical task as a scheduled task to update rclone if an update is found.
Updater #
Create a new scheduled task by going to: Create > Scheduled Task > User-defined Script. Enter the following settings:
General Settings:
- Task: Update rclone
- User: root
Schedule:
- Daily - This is up to you of course, daily is what I use.
Task Settings:
- Notification: Up to you, I enable this.
- Run command:
bash /volume1/scripts/rclone/install/rclone_dsm_install.sh
Once again accept the warning, and you will have two tasks which will reinstall and update rclone autonomously. If you have enabled notification via email then you will be informed about this.
Backup Scheduler #
To schedule the backup script is the same as above except we will be referencing the backup script and setting your desired frequency.
Create a new scheduled task by going to: Create > Scheduled Task > User-defined Script. Enter the following settings:
General Settings:
- Task: rclone Backup
- User: root
Schedule:
- Daily - This is up to you of course, daily @ 3AM is what I use.
Task Settings:
- Notification: Up to you, I enable this.
- Run command:
bash /volume1/scripts/rclone/backup/rclone_backup.sh
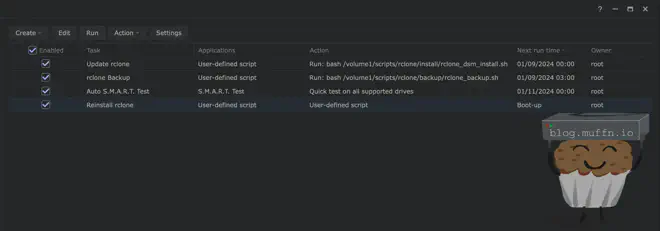
Once that is done you should have 3 user created tasks as well as the default SMART task.
🏁 Fin #
That’s it! You will now be pushing your local DSM data to a cloud backend of your choice.