🎬 Intro #
Cheap cloud storage is dead. 🫡
Storing vast amounts of data in the cloud at an affordable price is currently not feasible. Although it served its purpose for a while, I’ve decided to just build my own dang cloud again.
💰 Parts List #
| Item | Quantity | Vendor | Price | Total |
|---|---|---|---|---|
| AMD Ryzen 3300x | 1 | eBay | £65 | £65 |
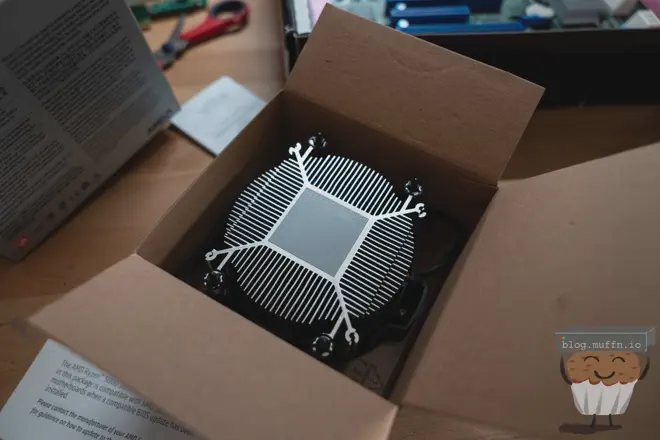
| AMD Wraith Cooler | 1 | eBay | £0 | £0 |
| ASRock X470DU | 1 | eBay | £130 | £130 |
| KSM26ED8/16ME | 2 | eBay | £30 | £60 |
| Fractal Design Node 804 | 1 | eBay | £85 | £85 |
| Antec EA-550 Platinum | 1 | eBay | £40 | £40 |
| WD140EMFZ | 6 | Friend | £100 | £600 |
| DC HC530 | 2 | eBay | £120 | £240 |
| 1TB PM871a | 4 | Already Have | £0 | £0 |
| 1TB PM871a | 2 | eBay | £35 | £70 |
| Intel X520-DA2 | 1 | eBay | £30 | £30 |
| Intel 10GBASE-SR SFP+ | 2 | eBay | £10 | £20 |
| LSI 9211-8i | 1 | Already Have | £0 | £0 |
| 9211 Full Height Bracket | 1 | eBay | £5 | £5 |
| Gelid Solutions Silent 4 | 1 | Amazon | £7.50 | £7.50 |
| SATA to SATA x6 | 1 | Amazon | £13 | £13 |
| Molex to SATA Splitter x3 | 1 | Amazon | £6.50 | £6.50 |
| SFF-8087 Breakout | 2 | Amazon | £10 | £20 |
| Startech SATA Power Splitter | 2 | Amazon | £5 | £10 |
The grand total comes to £1402. 🙃
Considering the parts list, this cost seems reasonable. However, I used to spend £240 annually for unlimited storage, which at the time was a better deal.
📋 Parts List Breakdown #
Continue reading this section if you’re interested in understanding the rationale behind selecting these components.
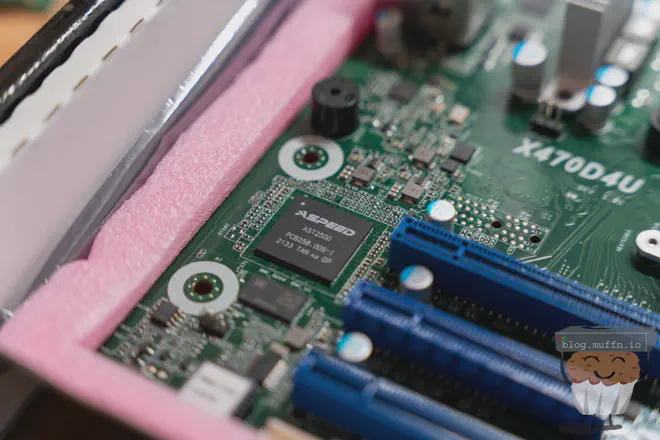
🔹 ASRock X470DU #
I was initially leaning towards a 10th Gen Intel build. While the AM4 platform was my preference, the available motherboards were lackluster. A 10th Gen Intel system provided a cost-effective and powerful option with low power consumption. TrueNAS, at the time of writing, couldn’t fully utilize homogeneous cores, making a 10th Gen Intel CPU a sensible choice in terms of price on the used market.
One day, I stumbled upon a listing for the ASRock X470DU priced at £150, which is a fantastic deal for these boards. Typically, in the UK, you’d have to pay a hefty premium to get one from a reseller. However, this listing had a few units available at a very reasonable price.
Originally listed for £150, I cheekily offered £130, and to my surprise, the offer was accepted.
There are several reasons for choosing this board, but the key highlights are:
- AM4 socket
- ECC compatibility
- Onboard IPMI via AST2500
- Decent onboard intel networking
- ‘Server’ grade hardware
- 2x NVME slots
- 8x SATA (6x chipset 2x ASM 1061)
- 2x PCIE x16, 1x PCIE x8
This board is a fantastic choice for a build like this. If you’re considering a similar AM4-based project, I highly recommend keeping an eye out for this board or its newer sibling, the X570DU.
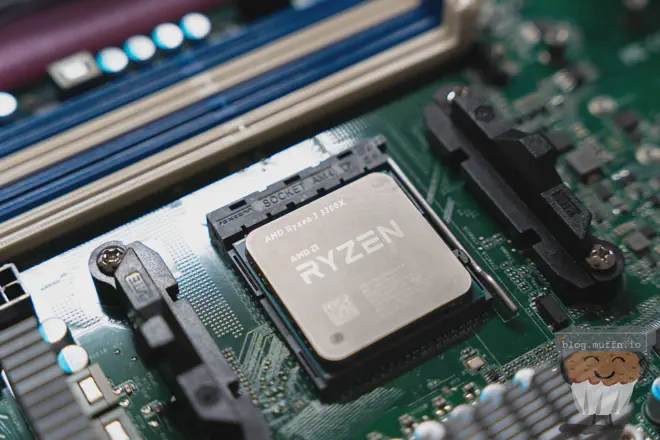
🔹 AMD Ryzen 3300x & Wraith #
With the platform and motherboard decisions locked in, I thought selecting a CPU would be straightforward. However, the CPU market is currently a buyer’s paradise. The main challenge was finding a CPU that offered the lowest idle power consumption for the price.
Ryzen 5000 CPUs were only slightly more expensive than their 3000 series counterparts, so it made sense to lean toward the 5000 series. For example, a Ryzen 3600 might cost around £60, while a Ryzen 5600 could be had for £80.
I ended up with the 3300x for 3 primary reasons:
- I found a listing for the 3300x with the stock cooler for £65.
- Both 3000 and 5000 series CPUs are based on the same TSMC 7FF node. Even with the IPC improvements in the 5000 series, idle power consumption should be relatively similar.
- The 3300x features 4 cores and 8 threads, whereas the 5600 I was considering had 6 cores and 12 threads. I believed that fewer cores would result in lower power consumption, although this difference may be negligible. In any case, 4 Zen 2 cores are more than sufficient for this TrueNAS system.
Ideally, I’d use something beefier but for the bundled price and the fact that there would never be any sustained load on the system, it’s fine.
🔹 KSM26ED8/16ME #
This memory is on the ASRock HCL and I found some sticks for £30 on eBay, so I grabbed two. Not much to say here, it’s ECC and it’s cheap. I could have gone for 4 sticks to make 64GB which would have been ideal, but it’s not really necessary. I can add more later.
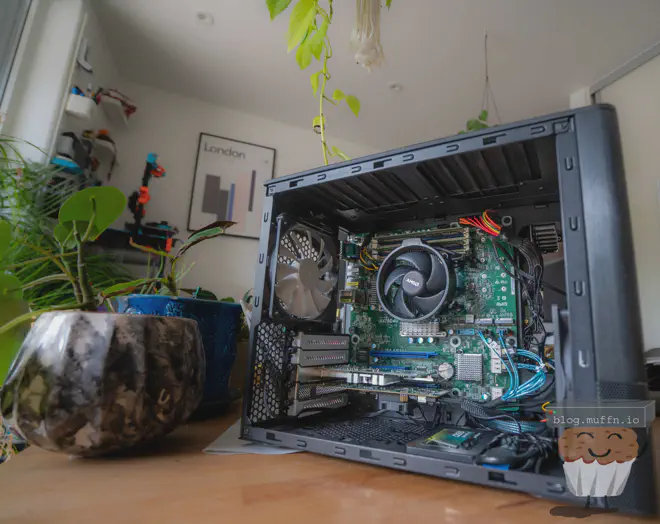
🔹 Fractal Design Node 804 #
If you’ve read my other posts on here or know me in any capacity you will know my love for Fractal products. The Node 804 fit perfectly. I wanted as much drive density on the smallest package possible. The 804 gives me 8x 3.5" drives in an mATX ‘box’. Down the line when I want to add more drives, I am going to play with getting another one and stacking them, with the additional one being a drive carrier, but that’s for another time.
TL;DR - Well designed, small(ish), dense case.
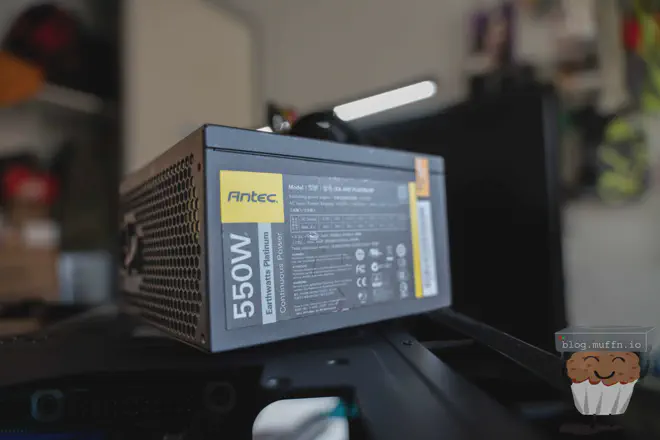
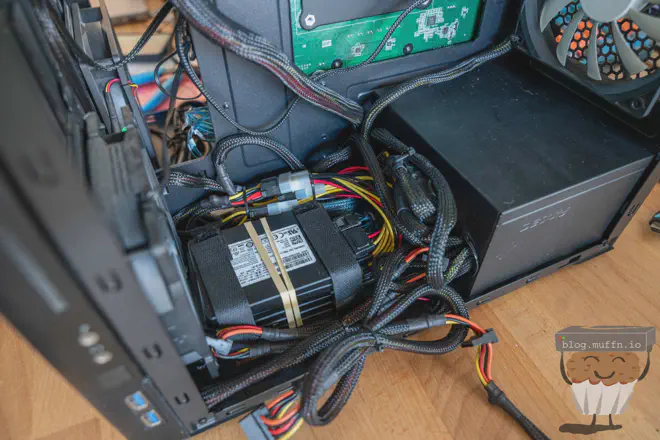
🔹 Antec EA-550 Platinum #
The PSU was the last part I needed to purchase. I was hell-bent on finding a used Platinum/Titanium PSU for a good price. After a week or so of looking every now and then and missing some bidding wars, my procrastination paid off and I found this for £40. This is an absolute bargain.
I’d never used an Antec PSU before but the rails were adequate, it’s 80+ Platinum rated and the reviews on the unit held up so I took a chance.
💾 Drives #
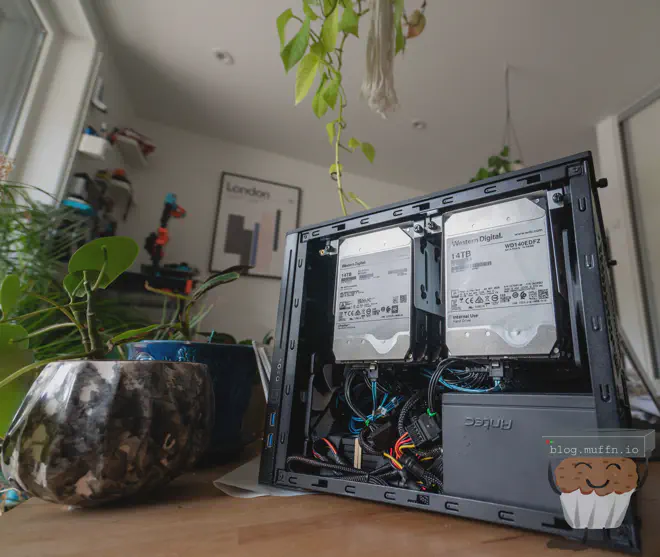
🔹 6x WD140EMFZ - (WD 14TB) #
I had originally planned to get 18TB drives which would have cost me around £1.5k by themselves for around the same amount of storage (obviously with less drives). As luck would have it one of my mates had a handful of 14TB shucked drives which she was willing to part with for mates rates. At £100 a drive this was a no-brainer, so I took her up on it and took all 6 she had.
🔹 2x DC HC530 #
The plan was to have 8x 14TB drives to fill the Node 804. I had 6, and I managed to secure 2 refurbished 14TB HC530 drives for £120 each. This isn’t a like for like of course but I am not too bothered about that. They are similar enough for me to be happy having them all in one array.
🔹 PM871a #
Cloud storage had become a crucial part of my backup strategy and whilst I do want to replace that aspect of my backup strategy at some point I would need an offsite pool to backup my important files.
I worked out that I’d need at least 4TB to keep a current copy of my files and I had on hand 4x 1TB PM871a drives.
My thinking was that for the cost of 2 more PM871a drives I could create a 5TB Z1 vdev from the X470 chipset SATA ports which would tide me over for now. Having SSDs also means I could be more ..creative with “mounting” as all 8 HDD mounts would be used in the case.
🔩 Misc #
Some misc points about some of the smaller bits and bobs.
Intel X520-DA2: The site this is going into has 3Gb/s symmetrical internet link and everything will be connected via 10Gb/s so it only made sense to add 10Gb to this.
Intel 10GBASE-SR SFP+: Optics for the above, unfortunately the card was more picky than I was expecting.
LSI 9211-8i: Already have, still the best choice really.
9211 Full Height Bracket: My card has the short bracket on, usually I would just remove the bracket and call it a day, but I have had issues where the card has come out of the slot slightly. With this server being remote for the cost of £5 to ‘do it correctly’ seemed like a good idea.
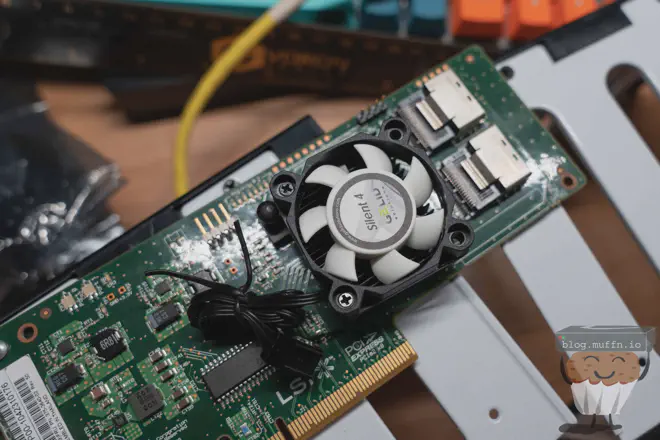
Gelid Solutions Silent 4: Don’t usually cool these cards, but they do run hot.
Various SATA/Power cables: Various cables you will see in the build.
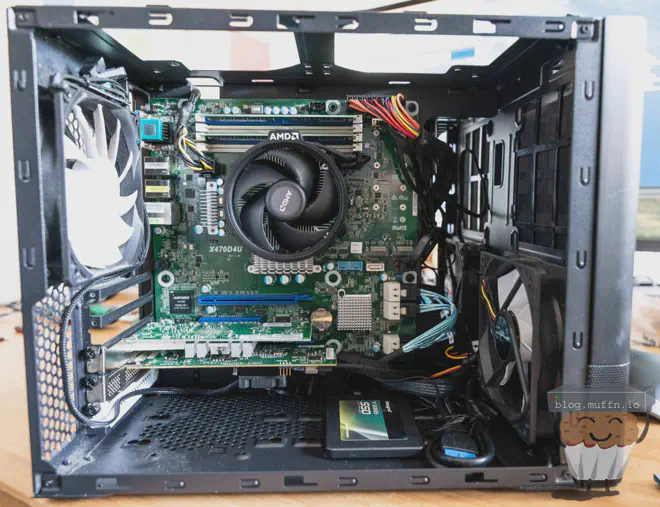
🔨 The Build #
The assembly process was standard, with no unique challenges.
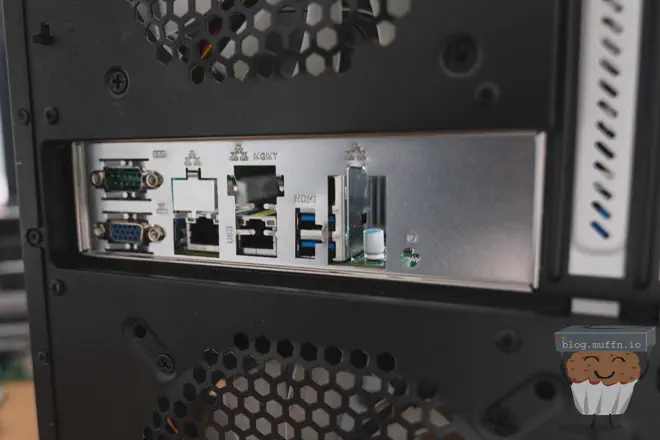
Unfortunately, the board’s IO shield was incorrect for this board. After contacting the seller they let me know that the board was advertised as ‘board only’ and any accessory such as the shield was added as an extra. They were right in the fact that it was advertised as being board only so I can’t fault them for that but it does strike me as odd to include a random IO shield just in case it worked.
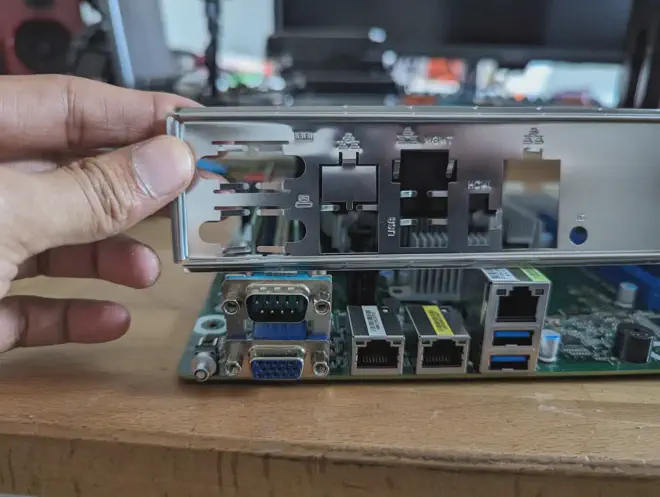
Anyway, running without an IO shield isn’t a big deal it just helps with airflow to keep things enclosed. I just wish I had noticed before putting the board in.
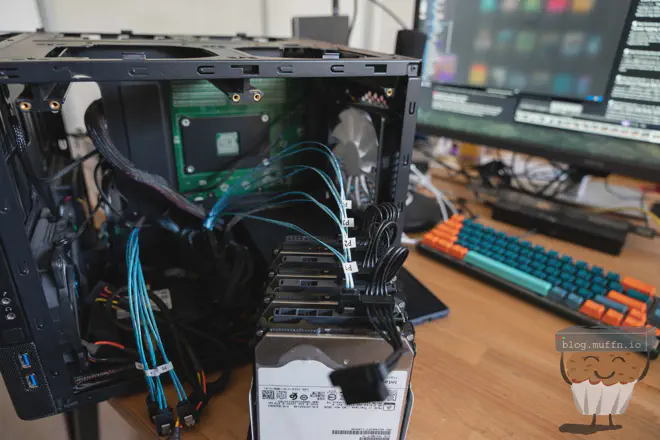
🔹 Jank Fan Mounting #
For the HBA fan, I ended up using some M2 screws and screwing them into the heatsink. I would have liked to use all 4, or at least have them on opposite corners but the heatsink was too small for this. In any case, it worked well and the fan isn’t going anywhere.
This did cause clearance issues with the PCIE slot directly below the card:

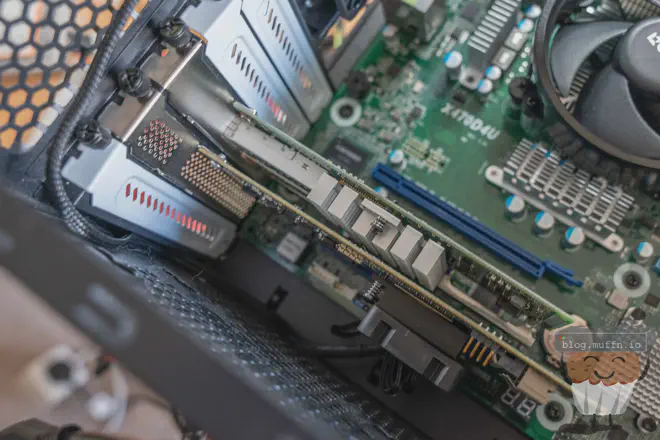
The HBA will be running at x8 speed which is more than enough. With spinning disks PCIE 3.0 x4 would have been enough.
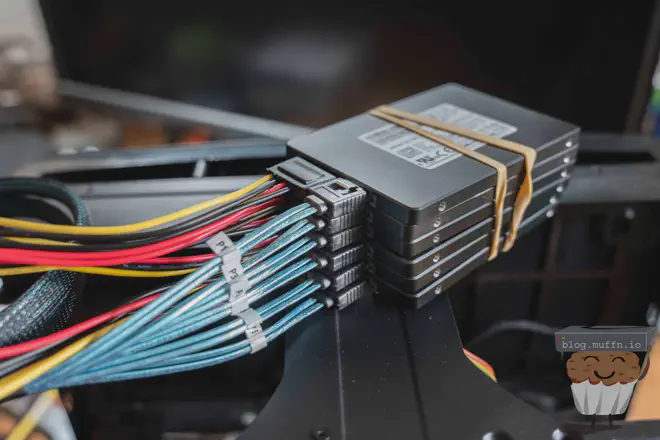
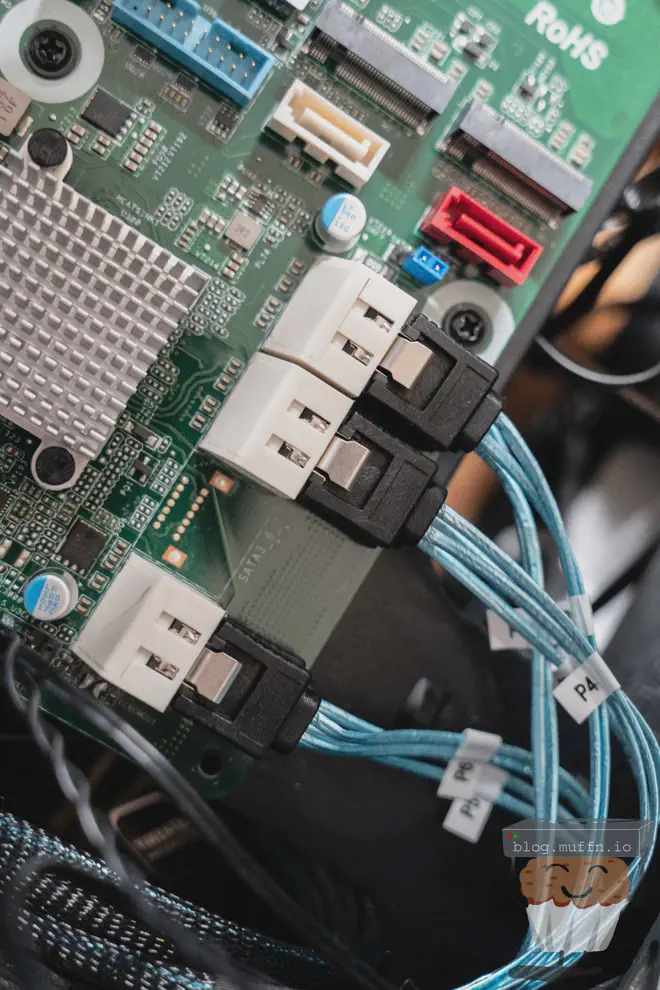
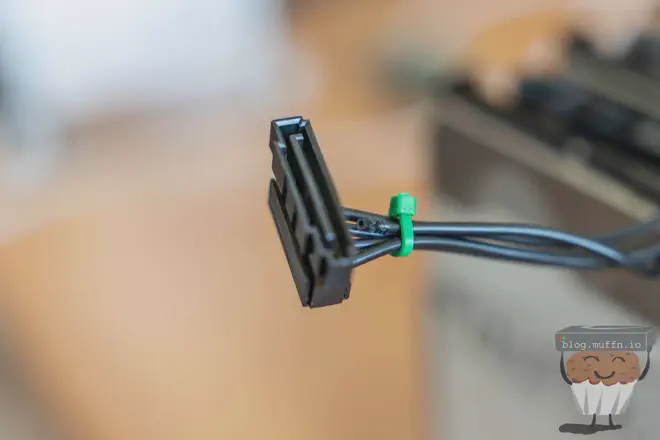
🔹 SSD Pool #
For ‘mounting’ the SSDs I just straped them together and used the cables I bought to neaten the power and data. This worked really well.
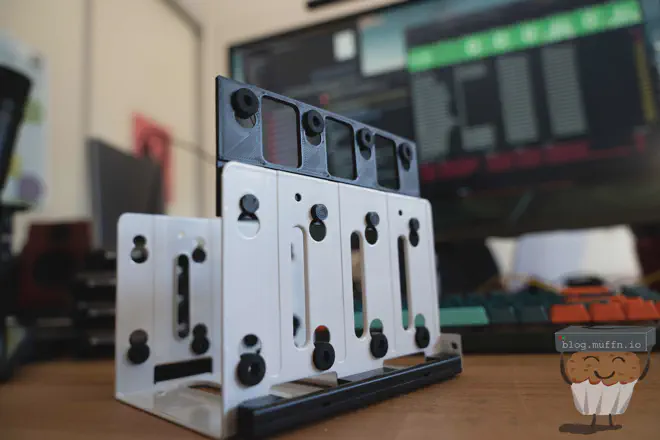
🪛 804 HDD Adaptors #
Owing to internal space restrictions, most high capacity drives have alternate mounting positions.
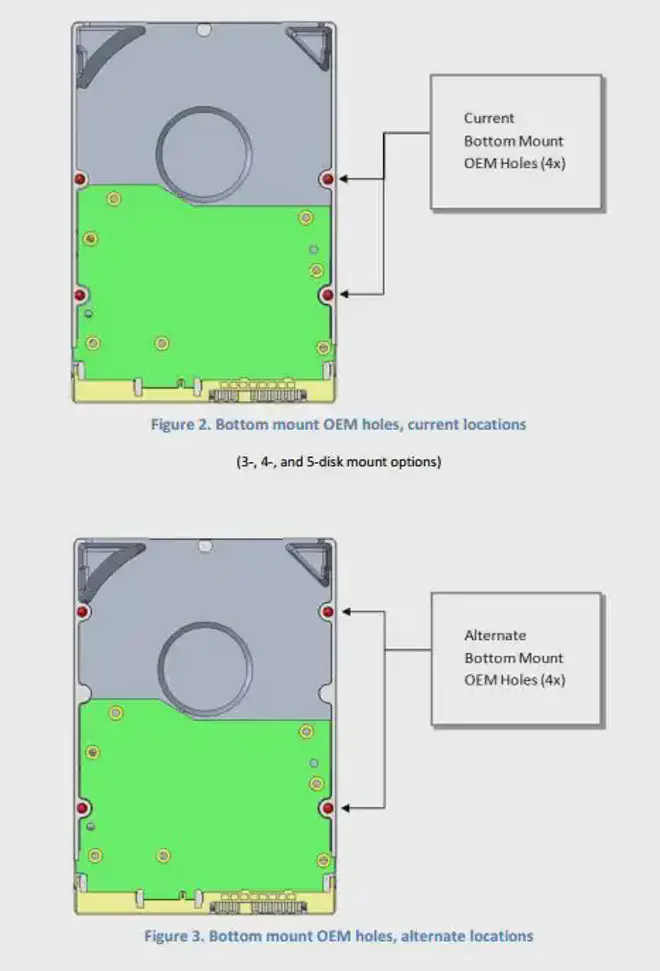
Newer cases/caddies have accommodated this in their designs but the Node 804 is rather old. Fractal design now
includes an adaptor for larger capacity drives but my case did not have these.
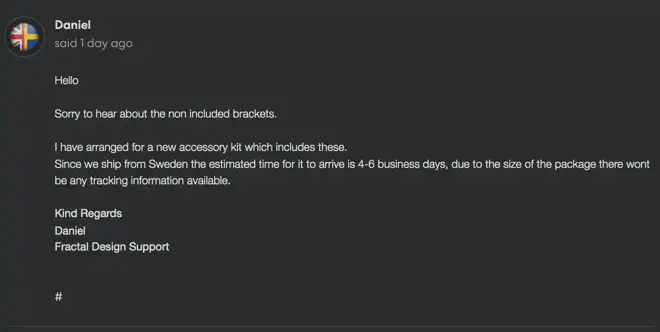
I’ve had great luck with Fractal Design’s customer support in the past with them shipping me free spare parts, so I raised a ticket in an attempt to get these adaptors, however, that could take a while.
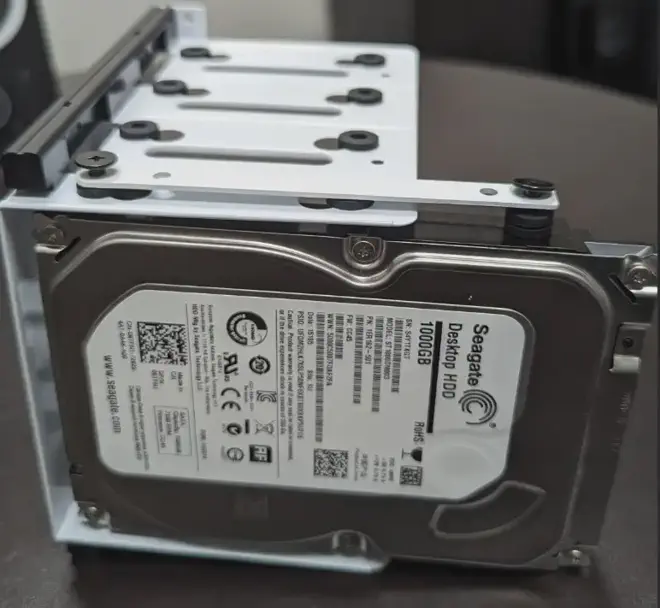
Mounting the drives with just the bottom screw was less than ideal. Even for someone that is perfectly content with janky setups this would cause issues with the drives being able to swing about and rest against each other.
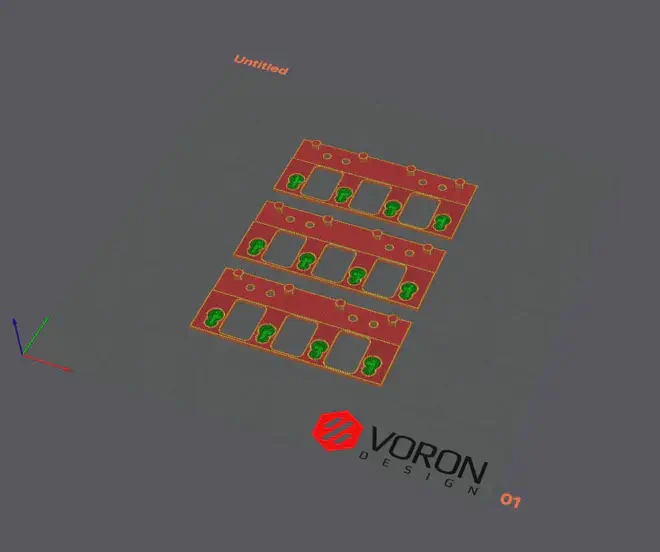
To get things moving, I found the following 3D design: Fractal Design Node 804 HDD bracket extender.
I went ahead and printed one ‘as is’ to test.
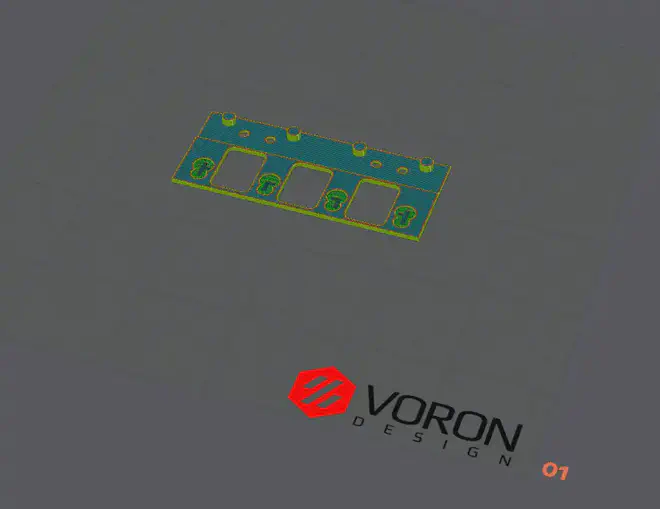
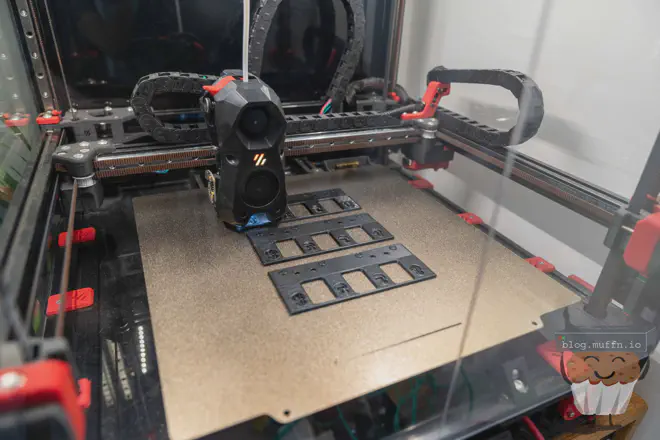
Here is my blog post about my Voron 2.4 by the way:
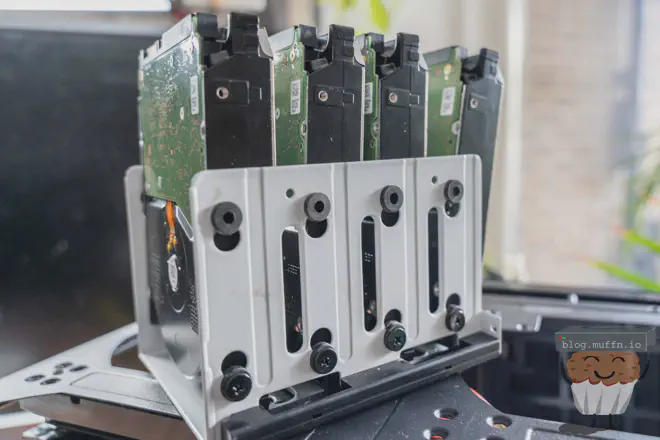
Happy with the design and fit, I printed the remaining 3.
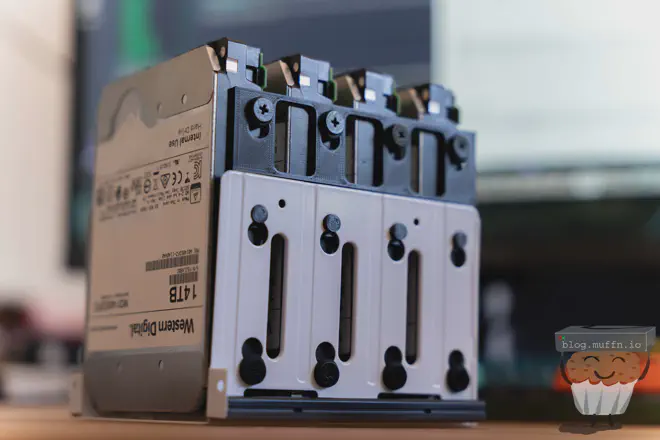
In under an hour I had all the adaptors printed and fitted.
💀 I Forgor #
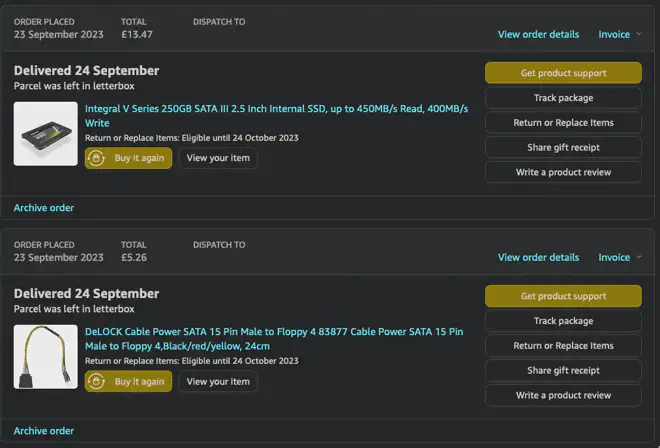
I forgor TrueNAS would need to be installed somewhere. The days of installing on a USB drive are behind us, and I overlooked this during my initial parts listing.
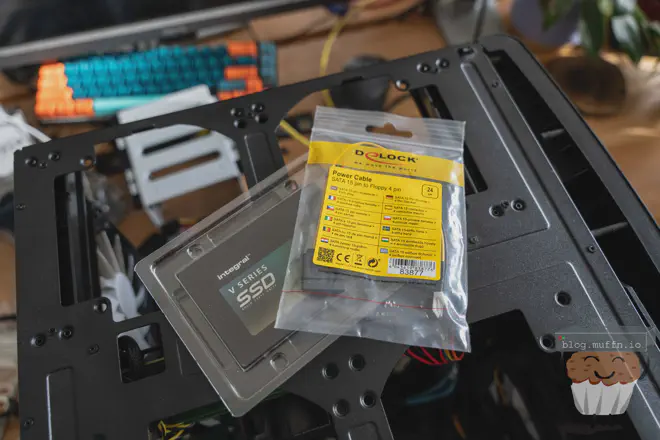
Flash can be incredibly cheap these days. As this drive has minimum r/w any drive will do. One Amazon order under £20 and the next day, I received an SSD for the installation and a floppy to SATA power connector, which was convenient for where I was mounting the SSD.
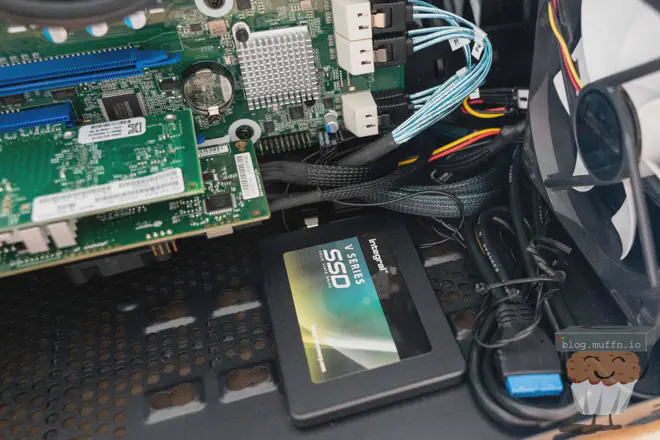
The SSD was mounted from the bottom with 2 screws and plugged into the first SATA port provided by the ASM 1061.
🔨 The Build Continued #
At this point all that was left was to connect and mount the drives. Everything was good to go and the ‘main’ bay of the 804 was done.
🔹 3.3v Fixing #
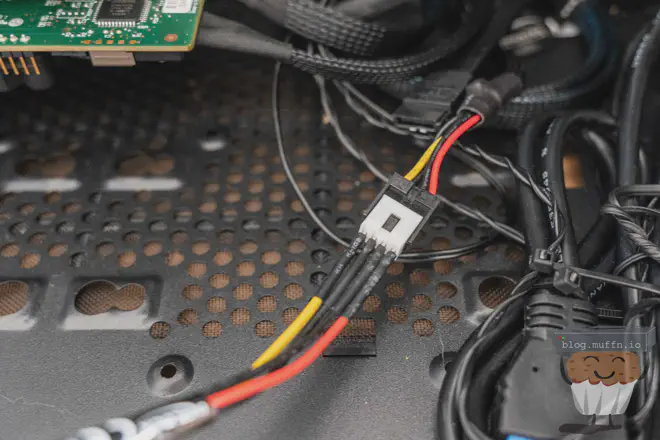
White label drives do not work with standard PSUs as they receive 3.3v which is for drive shutdown. This is fine in their original enclosures but when used in a more traditional setup it causes the drives to not power up.
There are several ways to get around this, with many taping/removing the pins on the drive that receive 3.3v, but I found the easiest way is to just remove 3.3v from the crimped cable which is really easy with the power cables I purchased.
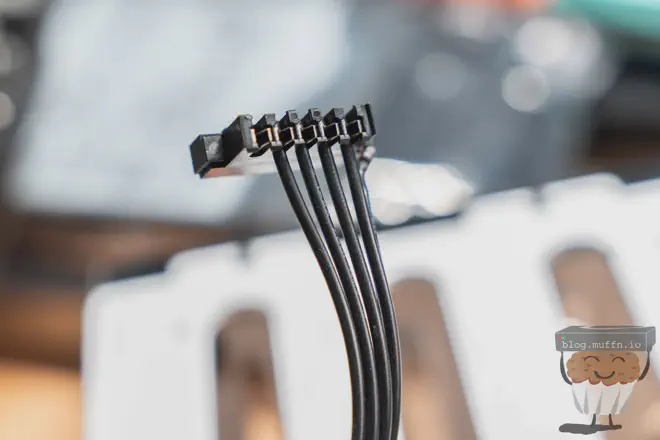
After doing this on both cables, the drives do not receive 3.3v and the issue is no longer an issue. This doesn’t affect the DC HC530 drives I bought to make 8 either as I do not know of any drive that uses 3.3v.
🔹 Drives #
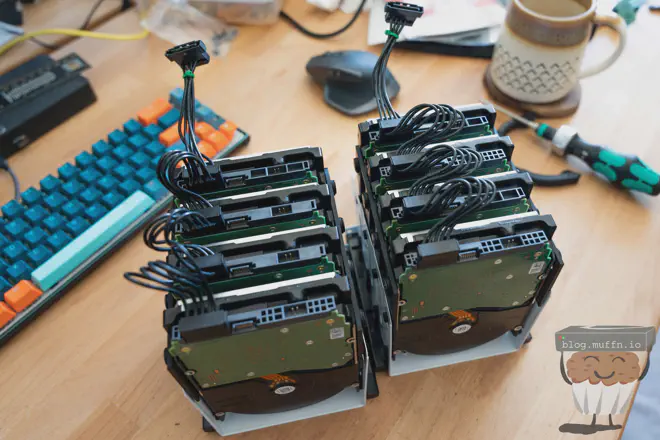
No build is complete without a build assistant of course.

⚙️ Setup #
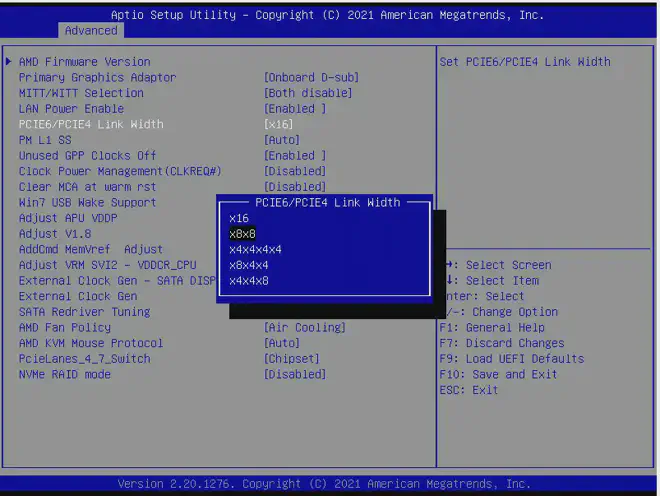
🔹 HBA Issues #
Everything looked fine on first boot using the IPMI console but I noticed pretty early on that the HBA wasn’t being detected. The lights were on but no OS would detect it, including SAS2FLASH.
After some manual reading I learned that by default these boards ship with full x16 speed on the top PCIE slot, slot 6. What this does is remove all lanes from the bottom slot, slot 4. There is an option in the BIOS to configure how the lanes are configured, and this is where one would configure the lanes for bifurcation.
The ‘fix’ here was to set this to x8/x8 and everything was detected as expected.
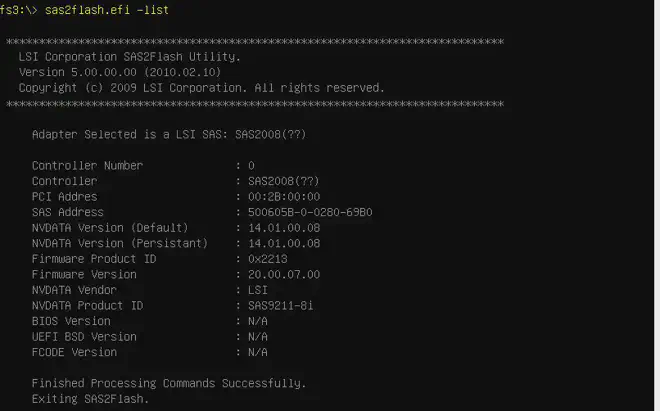
🔹 Old Firmware #
After getting the HBA and attached disks to show up I did the usual and checked the firmware of the 9211 as I had just found it in my box of spare parts so it was unlikely to have been updated and may possibly be in IR mode still. The firmware was ..ancient.

With some SAS2FLASH EFI magic though everything was as up to date as this thing will ever get.
💿 The Software #
I installed TrueNAS and did the usual setup, in the end deciding for a Z2 configuration as it dawned on me just how long a rebuild would take, and to needlessly lose all my data because I opted for a Z1 instead of a Z2 was too painful.
This is what the configuration looked like, with a raw 102T on the main array.
  pool: array01
 state: ONLINE
config:

	NAME                                      STATE     READ WRITE CKSUM
	array01                                   ONLINE       0     0     0
	  raidz2-0                                ONLINE       0     0     0
	    f2d66c4c-9558-4019-8f74-405609147a1b  ONLINE       0     0     0
	    34e15d2d-4634-40fc-b37a-ad8788dcc6ee  ONLINE       0     0     0
	    b5c106c7-86d7-4ade-a0e2-156481d9e4b2  ONLINE       0     0     0
	    b2ae32d8-3a4a-470b-b0a3-3b926db4e146  ONLINE       0     0     0
	    a23db397-81d2-4036-8779-3eb8c2ccf0fd  ONLINE       0     0     0
	    95cba835-9f6e-4923-aa38-b815ca61f783  ONLINE       0     0     0
	    554fdead-298e-47f1-a255-d963d156b0b3  ONLINE       0     0     0
	    a16bc7b9-84bc-4f40-9b98-9a056e92d79a  ONLINE       0     0     0

errors: No known data errors

  pool: array02
 state: ONLINE
config:

	NAME                                      STATE     READ WRITE CKSUM
	array02                                   ONLINE       0     0     0
	  raidz1-0                                ONLINE       0     0     0
	    b5f54fe6-227b-4f2c-b3b7-d94d8fbbf6f2  ONLINE       0     0     0
	    e9692e94-22de-4f07-9d1c-311e709ed3f9  ONLINE       0     0     0
	    412b6ef5-2672-4061-90ec-8721fd51b7de  ONLINE       0     0     0
	    f03a184f-859e-4ea7-993b-ec146833369e  ONLINE       0     0     0
	    358bb382-dc71-4b82-b9d2-ab50c10ecd5e  ONLINE       0     0     0
	    2e0eb717-4b4a-403f-bc46-6a85ebb1afa7  ONLINE       0     0     0
NAME        SIZE  ALLOC   FREE  CKPOINT  EXPANDSZ   FRAG    CAP  DEDUP    HEALTH  ALTROOT
array01     102T  9.20M   102T        -         -     0%     0%  1.00x    ONLINE  /mnt
array02    5.56T   912K  5.56T        -         -     0%     0%  1.00x    ONLINE  /mnt
boot-pool   232G  2.34G   230G        -         -     0%     1%  1.00x    ONLINE  -
That evening I was thinking about this, as my ADHD adled brain usually does, and I just thought this could be so much ..less boring.
With that, I scrapped the entire plan on how I was going to use this, and decided to document it in subsequent posts.
💯 Fractal Design Rock #
Fractal Design did end up sending me a complete accessory pack for free despite not needing the adaptors anymore. I will possibly change to the proper metal ones or keep it around for the future when I plan to enact plan ’node stack’.
I just wanted to point out, once again, the reason I frequently choose these cases. The company does a really great job; they didn’t have to send me anything, let alone for free, for a case I purchased second hand, but they always do.
🏁 Fin (Not Really) #
The build would have been done here had I not decided to switch things up in the following posts, but it would be too boring to finish this here. There’s much more fun to be had than standard ZFS using TrueNAS…
In its current form, this NAS is already a formidable storage solution that promises reliability and performance for years. However, at its core, it’s still just a computer. The real magic begins when we explore the myriad of possibilities modern FOSS software offers.
Thanks for reading, the following posts are linked just below 👀.